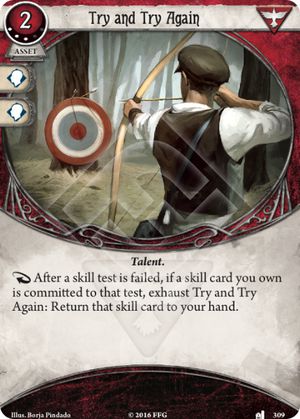
Ativo

Talento.

Cost: 2. XP: 3.

Sobrevivente

Após um teste de perícia falhar, se uma de suas cartas de perícia tiver sido comprometida a esse teste, esgote Tentando de Novo: Devolva a carta de perícia comprometida para a sua mão.

Borja Pindado
Lost in Time and Space #309.
Tentando de Novo

FAQs

No faqs yet for this card.

Reviews

This card needs two reviews, so I'll keep them short.

You know that skill test you really want to succeed on, so you throw at +2 card and some resources at it until it becomes an auto-success, smugly pop out a token only to have your smile wiped from your face as you glimpse that all-red of an auto-fail. This is a pretty good description of how easy/standard games might spiral out of control, but it is still a rare enough occurrence that the inclusion of this card is almost definitely not worth the XP. The benefit of this card in standard is mostly that you can throw cards at problems where spending cards wouldn't normally be worth it, for example to try an Investigate check at a net + of only 1 or even 0. And then on those checks where you do your best to eliminate the failure chance but the bag just wont play nice.

The other review is for hard and Expert, where your experience using this card will become starkly different. The token bag at this difficulty is far less forgiving at this difficulty and you will find that sustained skill attempts just wont work like they do at an easier difficulty, throwing a character's unmodified 3 at a difficulty 1 or 2 problem is drastically less likely to succeed, this card re-enables that strategy to an extent. I don't think it needs any further explanation that a card that rewards failed checks becomes dramatically better in game modes where failed skills are more common.
Tsuruki23 · 2532
"This card needs two reviews" - Is that to try, and then try again? ;p — AndyB · 956
For 3 xp wouldn't you rather just purchase Will to Survive? Maybe Harrigan can get some mileage out of this card... — FractalMind · 43

Try and Try Again works at ST.6, so it don't work with Take Heart or Predestined working at ST.7. However, Try and Try Again works with skill cards working at ST.2. You could commit Unrelenting to draw 2 cards and return it. You could commit Signum Crucis to add and return it. Try and Try Again don't require any slot unlike Grisly Totem. You don't need to pay additional 3xp for Relic Hunter. Eventually, Try and Try Again can be utilized for fail-based deck.

2 Drawing Thin + Grisly Totem + Take Heart + Try and Try Again + Unrelenting + Rabbit's Foot (+ Relic Hunter) 5 cards + 6 resources. Stella will be very happy with 10xp (or 16xp if taboo).

elkeinkrad · 486
Can you point to the rule? It seems weird to do the "after" of T&TA before the "if" of Take Heart. — Timlagor · 5
@Timlagor // You can check the detail of this ruling from one of the Take Heart review; check https://arkhamdb.com/card/04201#review-945 — elkeinkrad · 486
I think this is the most non-intuitive ruling in AHLCG. When you check the order of timing "during test", you should firstly find which step is related. This is because the strange timing is generated. — elkeinkrad · 486
Even the FAQ says this in sec — AlexBlume · 1
(2.2) Timing of “At…” or “If…” abilities Some abilities have triggering conditions that use the words “at” or “if ” instead of specifying “when” or “after,” such as “at the end of the round,” or “if the Ghoul Priest is defeated.” These abilities trigger in between any “when…” abilities and any “after…” abilities with the same triggering condition. — AlexBlume · 1
So if "if" cards happen in ST.7. how the heck does TATA which says "after" happen in ST.6.?? — AlexBlume · 1
Nevermind what I said before, the Arkham FAQ specifically addresses this in section 1.7: (1.7) Skill Test Results and Advanced Timing During Step 7 of Skill Test Timing (“Apply skill test results”), all of the effects of the successful skill test are determined and resolved, one at a time. This includes the effects of the test itself (such as the clue discovered while investigating, or the damage dealt during an attack), as well as any “If this test is successful…” effects from card abilities or skill cards committed to the test. <Reaction Triggered Ability symbol> or Forced abilities with a triggering condition dependent upon the skill test being successful or unsuccessful (such as “After you successfully investigate,” or “After you fail a skill test by 2 or more”) do not trigger at this time. These abilities are triggered during Step 6, “Determine success/failure of skill test.” — AlexBlume · 1

Ever fail so hard you win?

Take Heart + Try and Try Again = Fail

Drawing Thin + Rabbit's Foot = Even Better

(My review needed to be two hundred words to post. So I wrote a useless blurb on the bottom of my review. Honestly this process seems kinda of silly all things considered. I mean If someone can articulate a thought in a concise way without a long winded review wouldn't that be superior.)

redtitan · 54
There's been several discussions about this. Unfortunately, Take Heart and Try and Try Again do not combo together. Try and Try Again is a response to a skill test failing that occurs in Step 6, when you determine success and failure. You apply the results of failure (e.g. Take Heart) in Step 7. So you could return Take Heart in Step 6 using Try and Try Again, but you wouldn't get any benefit from Take Heart in the process. The upgraded Grisly Totem on the other hand does apply during Step 7 and will combo with Take Heart. — StyxTBeuford · 12987
Isn't the wording similar as in Grisly Totem, so Matt Newmanns response that Grisly Totem triggers in Step 7 applies to "Try and try again" as well? — Django · 5072
Sry, ignore my last comment. I hadn't read the detailed answers to Grisly Totem. — Django · 5072

Worked great with committing a single Rise to the Occasion, since it would usually bring your off-stat to 0~2 over the test difficulty. Just at the right value that I want to cover with this card. Make sense that they came in the same Investigator Expansion.

"Ashcan" Pete has 2 off-stats / that he can look for difficulty 4 to play with.

Also when purchased 2x for consistency, the commit of the 2nd one helped me several times in the scenario to help other investigators pass tests. Very flexible.

(Though it is not eligible to try again since it only works for a Skill Card, I made several misplays when committing Rabbit's Foot.)

5argon · 10020

IGNORE:

Stella is an amazing support survivor. Her unique card's ability to prevent failure penalties means that you could run low willpower investigators through tougher scenarios. With this, you get the chance to throw those No Fail cards at an ally once a turn. Especially in scenarios that add doom on failure, this combo prevents it. Worst comes to worst, you lose your Neither Rain temporarily until you play resourceful or True Survivor, and a teammate makes a vital but unlikely skill check.

MrGoldbee · 1453
That combo doesn't really work - Try and Try Again pulls the chosen skill during ST.6, and if you pull Neither Rain nor Snow from the check, by the time skill test results resolve the card is no longer there to stop them from applying. So if you use TATA to pull a card (except Defiance and Silas' personal skill, which have effects that resolve before ST.6), it's as if you had never committed that card in the first place. — TheNameWasTaken · 3
afaik grisly totem(3) should serve that purpose — schafinho1 · 55
Pretty certain grisly totem (3)'s effect is an effect of the failed test (rather than a response to a failed test) so if NRNS is in the test then Grisly Totem (3)'s effect gets cancelled — NarkasisBroon · 10
oh, you're right — schafinho1 · 55
@narkasis, not exactly, current community consensus (supported by the rules proofreader who I must disclaim is NOT a formal rules authority but is well-regarded) is that just like you get to choose the order of successful test results in ST.7 you similarly get to choose the order of failed test results. So, you could resolve all your "if you fail" effects and then trigger NRNS to cancel the rest. — Sycopath · 1
@Sycopath while you can choose the order, it doesn't matter. If you choose NRNS to resolve first, the totem's effect is canceled. If you choose to resolve the totem first, NRNS is returned and it doesn't cancel any fail effects. — suika · 9437